Monday 10 January 2011

A Lemon and Lime Birthday Party -The Details

I briefly mentioned the Lemon and Lime Birthday party I planned for my husband in September. So following my earlier post on the inspiration for it, here are the details of the party ( with a lot of delay!) - Decorations, Cake and Food!

For the decorations, I knew I wanted to keep it elegant and grown up but most importantly, nothing over the top to suit the mood of a relaxed lunch. I therefore designed and then assembled a birthday banner, to serve as my backdrop for the food table ( it was a buffet). I only used Microsoft Word for this, which goes to show that you can really create simple but unique decorations if you are really motivated.


I then also made some tissue pompoms in yellow, green and some cream ones as well for room decoration. These were easy and very cheap to make, especially as you can buy packs of tissue paper for not much. I used this very helpful tutorial which I found on this fun blog. Pompoms are ok to make if like me you are making a few. I made seven. But I guess you would need  some friends and good wine if you had to make say a hundred for a wedding or bigger event!  Behold some of the pompoms below, and a glimpse of the food table.
Can you see my vase with the lemons? I coordinated the vase with some leftover green tissue paper and yellow ribbon. I also customised my green hurricane  vase by wrapping it with yellow ribbon.

I kept the table simple -cream tablecloth, white dishes, which I coordinated by lining with pale green patterned paper. I bought some yellow paper napkins and some green paper bowl things to add some pops of colour.
Of course the star of the table was the Hummingbird cake, which I made. I used the HummingBird Bakery's recipe, and the  3 layer cake turned out amazing. Very moist and yummy! I bought coordinating yellow and green candles, and also made some cute paper flags to decorate the cake. Next time, I'll do some mini bunting, which I find so adorable.
Here's a close up:


For the food, I decided to do an Indian food buffet, as we all love indian food. Plus it gave me loads of options for one of  my vegetarian guests.
I designed some coodinated food labels,  for each dish to add some more detail and interest to the table.

Another shot of the cake and some of the table details.


Some more poms!
It all came together perfectly, and I was happy with the overall result. It was my first attempt at a coordinated and completely home made party, and the happiness that can be derived from simple gestures like cooking the whole meal, baking the cake or putting up decorations you have made from scratch is utterly amazing.
My husband was beyond happy, and I think it was obvious to him that I had gone a long way to make his day special. So as a result, I was very happy myself!
A.

Tuesday 4 January 2011

A special In the Night Garden Birthday Cake

The content of this post is actually nearly 2 years old! I did not have a blog back then, and this morning, I was looking through my past baking projects, and thought it would be a shame not to write about this very special one. Special because it was my nephew's ( who is very special to me and my husband) 2nd birthday cake, and also because it was the first time I made such an elaborate cake involving fondant. The end result was very satisfying to me, and it felt great to have produced this cake.

It did take me 3 days though, because i worked on it in stages, as you will see below.
But, it was totally worth it and the various steps involved should not put you off, in case you also want to have a go at using fondant.

I should probably explain what In the Night Garden is, in case you don't know. I only know about this children's show because said nephew is a big fan. The show takes place in a garden, and its main characters, which are animated puppets are Iggle Piggle, Upsy Daisy, the Tombliboos and Makka Pakka ( really). It's very colourful and kids here in the UK love it to bits. In case you are curious about the characters, you can have a look here.

So I thought, what birthday gift would be more amazing than a cake with the characters? I obviously had to do some field research ( i.e. Watching some episodes and googling some images!). It quickly dawned on me that if i wanted to replicate a colourful scene, the cake would have to be covered with fondant ( which before my research I referred to as "that coloured paste thingy). Also, the characters would also have to be made of said thingy.

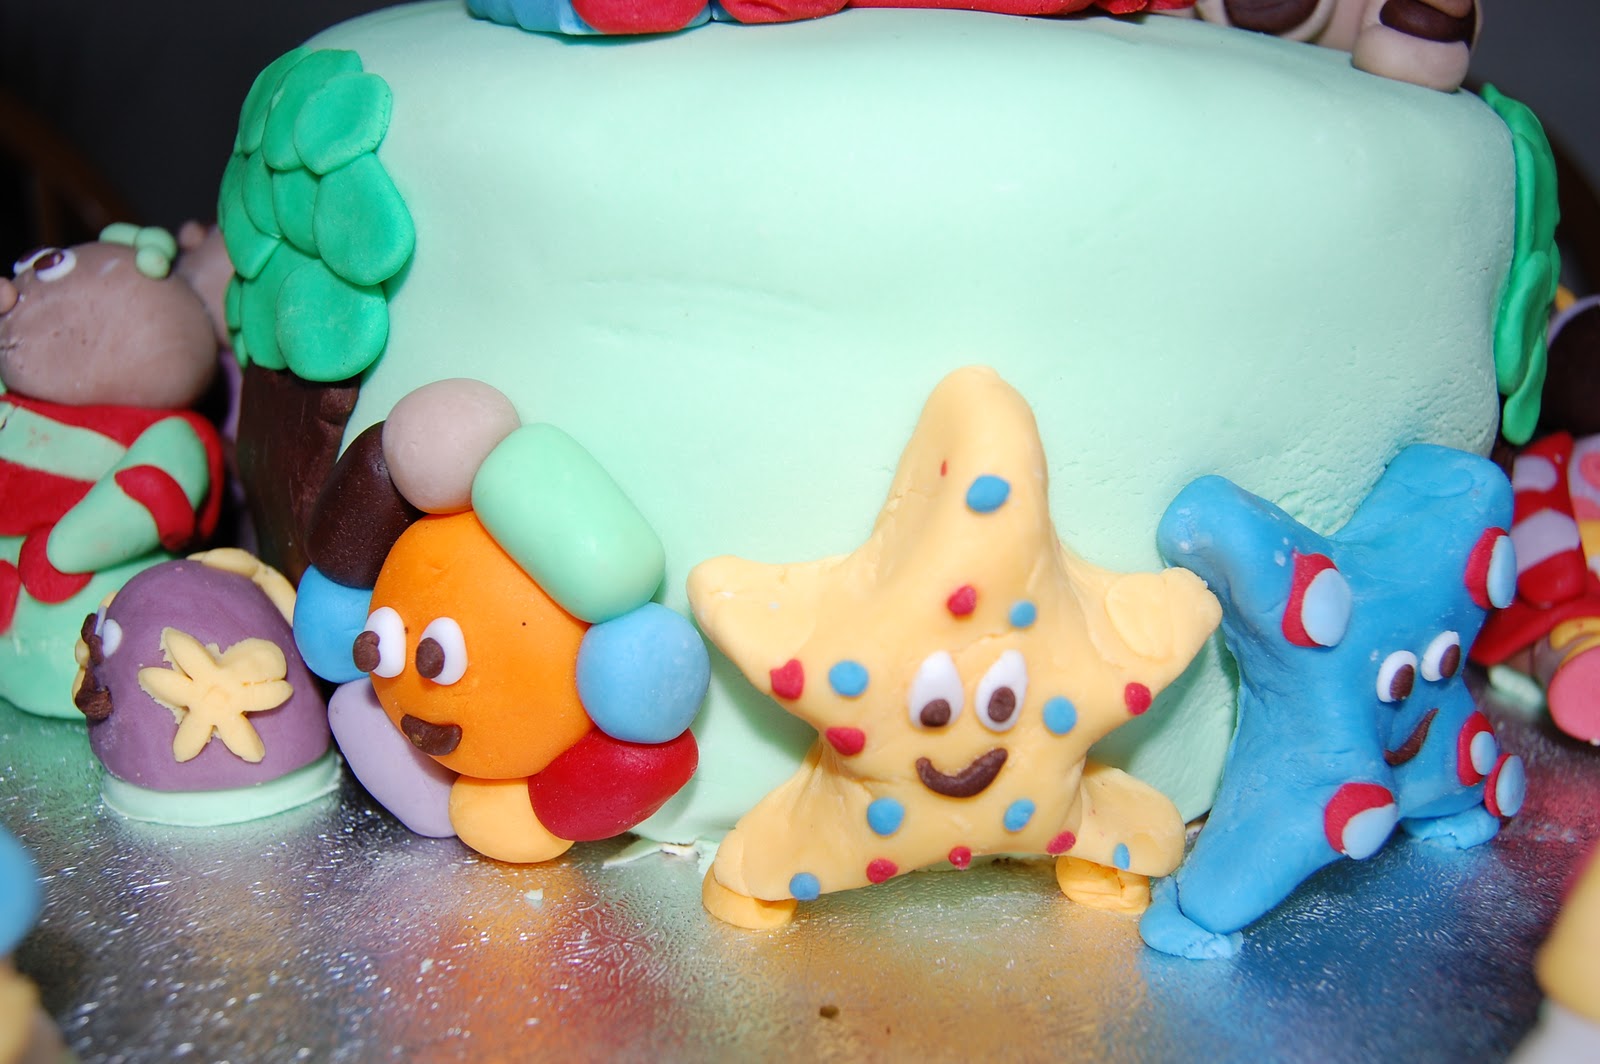
My research taught me that fondant is also called sugar paste, and that you can buy it in various colours, or plain white blocks ( which you can then colour yourself). And the best thing? It is all available online. I can't remember the website I used, but google, as usual, will have answers. I bought a combination of white and a couple of already coloured fondant packets. Equipped with all my gear, i started by making the characters. I have to say, this does get easier with each one you make. I think my confidence just grew and as a result, the characters, looked really good after the first one. I am particularly proud of my Makka Pakka :)

I made the characters and other props over two days:


A good tip, is to use toothpicks or bits of dry spaghetti to hold the various parts of the characters together. You avoid wobbly heads or dropping arms that way.

Then, the most important thing to decide - the cake itself. After all, if it didn't taste good, what was the point? I made a 3 layer cake for this project, as I thought it required that height. I made a simple chocolate cake, and filled the layers with fresh strawberries, blueberries and cream. This I did the day before the party.

A crucial step when making a cake covered with fondant, is that once your cake is baked, cooled ( I freeze my layers before filling them. Makes them much easier to work with)  and assembled with its filling between the layers, you need to cover the whole thing with a thin layer of buttercream. This was one part of the cake I didn't make. I bought a tub of vanilla buttercream from Sainsbury's, and it did the trick.

There is one final step before you get to the fun part of assembling all the characters and making the cake come to life. That's the covering of the cake with fondant part. As I wanted the cake itself to represent the garden's grass, I coloured white fondant until it became the right shade of green. ( I use gel colours as it is the right consistency. Again, you'll find a range of such gels online. Sugarflair is a known brand). I had a look at some tutorials on youtube which greatly helped with the rolling of the fondant ( I did not really enjoy that part! but with perseverance, it can be done) as well as with the covering of the cake. I think it does help to see how all this is done when you are a novice, and then it is easier to execute.

So, after much hard work, but above all, incredible fun and pleasure, I assembled all the bits the night before the birthday party and I give you my first ever fondant cake!


I cannot describe the feeling of satisfaction and the sense of achievement I felt when I completed this cake and when I took it to the party. My nephew was delighted, and he immediately said "Iggle Piggle!", which at least reassured me that my depiction of the show was realistic, if such a loyal fan could instantly recognise the characters!
So all in all, a great success at the party, and the cake was yummy too.
A.

Monday 3 January 2011

Cupcake Time!

Cupcakes, cupcakes everywhere, cupcakes cupcakes do i dare?
Honestly, I could look at cupcakes all day. Pretty, dainty and tempting, they are such wonderful creations. I could also eat one ( or more) everyday! But guess what? I have always been rather nervous about making them. Having bought the gorgeous Hummingbird Bakery recipe book on a frankly drool worthy trip to their shop in Notting Hill, i did attempt the lemon cupcakes. Suffice to say, they did not turn out well. I won't lie to you, it was all my fault of course. I overbaked them, I did not use a muffin tray ( lunacy right?). They came out oval shaped crunchy things.

However, I have since invested in these fantastic silicone cupcake cases and also a muffin tray. Thus equipped, I decided to make The Hummingbird Bakery's banana cupcakes with chocolate frosting. And this time, they turned out perfect!
They were moist and yummy! However, I have to admit that I tweaked the frosting recipe. It called for 300 grams of icing sugar, but i only used half of that amount. That quantity was great for me and for my guests. I guess using the 300 grams would have made it just sickly sweet. But maybe that's just me.

BUT, the best part of all this? i got to use my brand new icing tips and bag :) I bought them recently with the wish of decorating cakes, cookies and yes cupcakes. Having never iced anything before with an icing bag, I checked out a couple of video tutorials on youtube and had a go. It was great fun and my lovely cupcakes turned out even more lovely with beautiful swirls of chocolate frosting on top. As you'll see from my photos ( sorry about the quality, took them from my phone), I tried various designs, and topped them up with little edible silver balls.

There were compliments all round, on the look and more importantly the taste of these little babies.
So, yes, from now on, I do dare! If you want to admire more beautiful cupcakes or bake some, you can have a look at The Hummingbird Bakery's website here http://hummingbirdbakery.com/cupcakes/ or for more inspiration, one of my favourites http://www.savethedate4cupcakes.com/
A.